Ready to start the ornament challenge? Me too!
So... the other day when I sent out the Frequently Asked Questions email, I asked if you would reply and let me know if you were doing this challenge....
...and we got hundreds (even more than last year!) of replies saying "YES! I'm doing the challenge!" In fact, the yes's are still coming in. It's incredible. I am so excited. I can't WAIT to see all of your ornaments.
We're starting with an easy one: The Basic Star Pattern!
I’m starting with the Basic Star, because it was my VERY first tutorial, and it's easy. And also, it's awesome. ;)
This is the one that's based on the old-fashioned ‘Quilted Star’ technique that has been around forever and ever. Over the years, I changed it up a tad and put my own little spin on the techniques I use to make it.
And guess what? If you're new to this, you can learn how I make them, for free (yes, FREE). I have a 3-part video workshop, teaching this pattern step-by-step. I'll lead you through it all.... what you need, what to do, and how to finish it. Click RIGHT HERE for the videos.
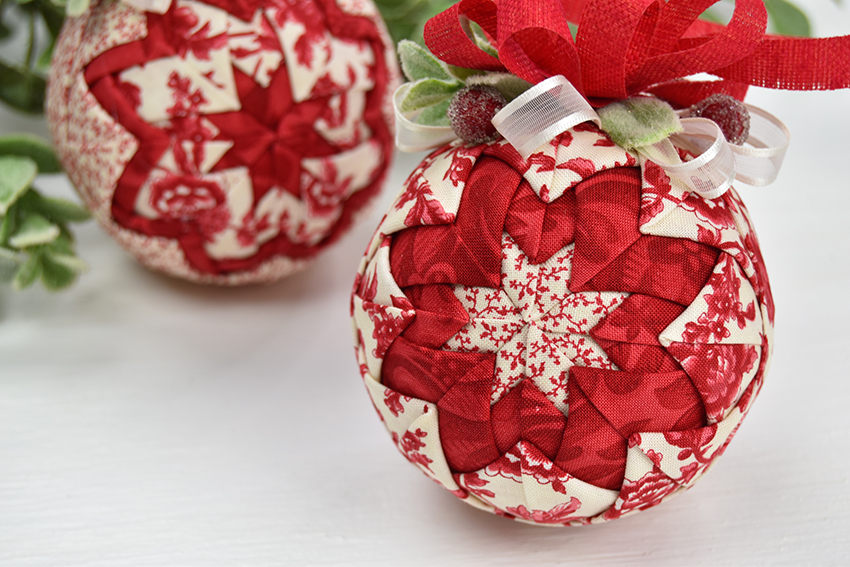
I did two again this year. (The Basic Star can be made in SO many ways).
The two ornaments below almost look like 2 different patterns, but there is actually only ONE difference: I did one with three layers, and the other with four. You can also vary this pattern up by simply widening layers, or bringing them closer together.
TIP: Make a layer wider if you've got a fabric with a larger print on it.. so more of that print will show. (I did that in the first picture below, to show more of the larger floral print.)
That's what I LOVE about this pattern – just change the order of fabrics, or the width between layers, or one of a zillion other details... and you will be able to create totally different looks.


StaciAnn & Maria: I have been wondering about this, for months: when cutting the fabric, must you removed that strip along the raw edge of the fabric? The strip that is usually white, showing the colors within the fabric. I think I do not need to remove for the Basic Star, but generally?
Pamela, I think you are talking about the selvedge? I do generally cut that off (out of habit), but you actually don’t have to. If your fabric rectangle has that along the edge, you can simply fold that part over so it’s hidden when you place the piece onto your ball. Does that make sense? That might save you a tiny bit of fabric in the end, or even enable you to get an extra rectangle out of each strip.
Yes, that makes perfect sense. I suppose, too, it would depend on the pattern. Thank you for your response.
I am not on Instagram.
Susan, that’s okay.. please do show us in the OG Fb group though if you can. :)
I happened across a 6″ stryfoam ball while cleaning up my craftroom. I was thinking about doing it up as a large ornament. Do you know what size i would need to cut my fabric in order to be able to accomplish this?
How do I get instructions to previous ornament kits. I purchased April 2019, and December 2019.
Hi Deb, can you email us so we can help you with this? http://www.theornamentgirl.com/contact Thanks so much! Janelle