
How to make glass popcorn ball ornaments | DIY
Today’s ornament idea is really quick and easy, but super nifty…popcorn inside clear glass ornaments. I can’t take credit for this idea…I saw it on make-stuff.com (and there are a few other cute ideas for clear glass ornaments on that page, too, so check it out) and I’ve been wanting to try it for myself and see if it actually worked.
I did have a few tragic glass ornament casualties while I was experimenting…but once I figured out the correct popcorn kernel to microwave time ratio (very scientific), they came out really cute.
You’ll need:
- Clean and dry clear glass ornaments. (These are cheap cheap cheap at Michael’s and Joann’s at Christmas-time) Make sure you only use clear ones, not any that are frosty or pearly or anything like that…those could cause major issues in the microwave. And even though I love Christmas ornaments, they certainly aren’t worth burning the house down over. Oh, on that note, count on a few extra than you expect to need…I had one break on me, and I also used a few extra while I was trying to get my microwave time right.
- Plain popcorn. Don’t use the microwave kind, because they are all greasy and will make the inside of the ornament all icky looking.
- A brown paper lunch bag
- A small microwave safe dish…I just used one of those little mini Pyrex prep bowls.
- A ribbon to hang the ornament from.

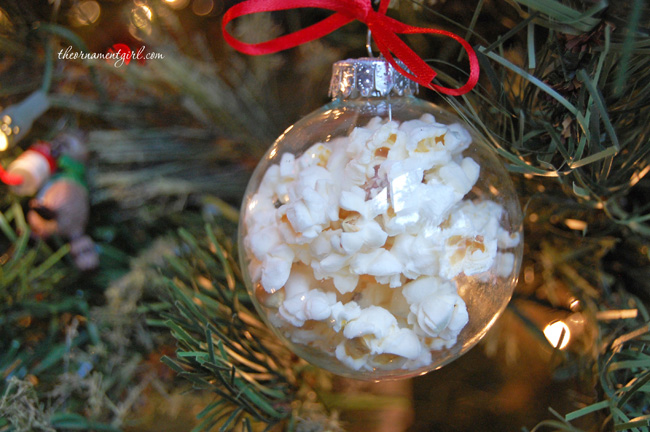
There will still be some unpopped kernels left…after the ornament has cooled down, just shake the leftover kernels out, pop the lid back on, and tie a piece of ribbon to the top…voila!
You could even dress it up a little by adding other things, like artificial berries, mini pinecones…just keep in mind that if you put anything in that’s got any weight to it, it’s going to fall to the bottom and stay there.
Very simple, but also really festive!

An update!
I had a few people ask if this ornament would last in storage. Here is mine after a year in my stifling hot Florida attic… it’s still looking pretty good!


I love this idea. I just have a stupid question: do you have to get rid of the popcorn after Christmas or does it “keep”?
Not a stupid question at all…I’m actually wondering the same thing myself. I am going to pack mine away and see how it looks next Christmas. :D
You can pack them i have some from 2010 and it still looks great!!(:
Thanks, Savanna! Mine still looks great too!
Until this year, I had some that were 12 years old. They still break when you drop them LOL, but I always just put them back into their box and stored the box in the same rubbermaid tote as the rest of the ornaments. Never had an issue – they looked great every year.
Thanks for the directions – I couldn’t remember exactly what we had done and I did want to make some more as they always receive comments. I do remember the paper bag as extremely important when figuring your microwave settings. Every one is different. Mine at home did one setting, when we did them at school, that microwave took less than 45 seconds!
Wow, that is awesome that they still looked great after all that time. Thanks for sharing that with us! :)
My ornaments are make of plastic. Could I use them the same or do they have to be glass.
Hi Deana, I don’t see any reason why you couldn’t use plastic for this ornament. Have fun!
I made these about 12-15 years ago and they are still as fresh and beautiful as the day I made them. They are definitely conversation starters. EVERYONE wants to know the secret to getting the popcorn inside the ball.
That’s so awesome!
No, I’ve done some that are over 16 yrs old and looks good as the day I made them.
I’ve had mine for like 10 years looks good happy holidays
It would be helpful to know what size ornaments you used. Mine were too large and I had to go back to the store and start over.
I tried to make these awesome ornaments but I tried twice and both times hot kernels like shot up out of the ornament and broke it. Has this happened to you? Do you know what is going wrong???
Hey Lindsey… I had a few breakages too. I had to figure out the right amount of kernels and the right amount of time, and once I got it, they all worked pretty well after that. You might try adjusting the amount of kernels a little from what I wrote above because of our microwaves being different.
But yes, I probably broke 3 or 4 before I got it right, which is kind of a bummer, but once I got that time/kernel ratio down, I didn’t have any more problems.
I wish I could give you an exact answer…. good luck though!
Lindsey, I never asked before, but did you make sure to use the paper bag? I think that helps them pop faster, in the same way that the microwavable popcorn bags do… you probably did, but I just want to make sure.
[…] Popcorn Ornament by theornamentgirl It’s the biggest saver I’ve ever found. So many good things about this idea: […]
Could this possibly work with the clear plastic bulbs? As well
I definitely wouldn’t try microwaving a plastic ornament, but they do make plastic balls that open all the way up. You could pop some popcorn separately, and then add them to the ball afterwards, and I’m sure that would work great!
This is adorable! I’ve linked to it on my blog… Thanks for sharing!
Melissa, thank you SO much…I appreciate it! :)
I made these, and they came out so nicely! I actually used larger plastic ornaments, which were great because I was able to pop the popcorn before hand and just put it into the ornament through the larger opening. I added some rhinestones to the ornament, ribbon around the hook and paired them with handmade fancy hangers (you posted about) and they look AWESOME.
Thanks so much for the inspiration!
Renee, that is great to hear! Thanks for letting me know how they came out! I love the idea of using the plastic too, so you don’t even have to worry about the ornament breaking. That’s awesome!
[…] This brilliant idea was done by theornamentgirl.com […]
[…] Image […]
Great tutorial!! Must have been fun to make. I shared on my site. Thanks!
Thanks, Diana! I checked out your ornament round up… lots of super cute ones!
[…] The Ornament Girl […]
Just wanted to let you know I featured this project in my roundup of glass ornament crafts here too. : )
-Mel the Crafty Scientist
[…] Popcorn Ball via The Ornament Girl […]
[…] memorable trip or honeymoon. I’d put a tag on it saying the date and place, too. Glass Popcorn Ball Ornaments The Ornament Girl I could see adding a few cranberries to this! Wedding Invitation Ornament […]
[…] Source: theornamentgirl.com […]
Ornamentgirl, do you have any idea how I can start off with a small ball and kernells inside and have it expand into an ornament size ball in the microwave as the kernells pop? I really appreciate it. This is for a kids project.
I tried in a brown paper bag and the bag burnt and none of the kernels even popped. What can I do?
Any suggestions on coloring the popcorn?
[…] a Christmas craft that I found on The Ornament Girl. I just couldn’t resist sharing! You just gotta love the versatility of popcorn. It can […]
I do not even understand how I stopped up right here, however I believed this
submit was once good. I don’t know who you are however certainly you’re going to a famous blogger in the event you
aren’t already. Cheers!
I made these when I was 12!!! I’m 24 now and we still use them on our tree every year. They last EXTREMELY well in storage!
Undeniably believe that which you stated. Your favorite justification seemed to be on the
web the simplest thing to be aware of. I say to you, I certainly get irked while people
think about worries that they just do not know about. You managed to hit the nail upon the top as well as defined out the whole
thing without having side-effects , people can take a signal.
Will likely be back to get more. Thanks
I was looking for how to do these popcorn ornaments. I have had the one my aunt made in 1999. I use it on the tree every year.
Someone asked how long they last so I just wanted everyone to know – mine is over 10 yrs old
Thank You THANK YOU Ornamentgirl for sharing this :) I looked all over youtube & couldn’t find out how to do this. Gonna try this soon
[…] Popcorn filled Ornament from The Ornament Girls […]
I have some crystal ornaments. Will they work as well.?
[…] Glass Popcorn Ball Decoration – The Decoration Woman […]
I have a couple of these that I mad over 20 years ago. They look just like they did when I made them.
I just made more to give away and I have a tip for you.
I put a quarter piece of paper towel in the Pyrex dish before I put in the ornament to lessen the chance of breaking. So far, so good
Hi Pam, that is a great tip! Thanks so much!