
A Variation Idea for the Free Moonlight Ornament Pattern.
When you sign up for my email list, I send you a free pattern e-Book, for an ornament design that I created several years back, that I named “Moonlight”.
It's one of my all-time favorite ornaments (blue is my favorite color!), and it's just one of those craft projects that ends up looking even more beautiful than you expect it to!
What a lot of people don't realize is that it's also a very versatile pattern that you can make simple changes to, to create a totally different ornament.
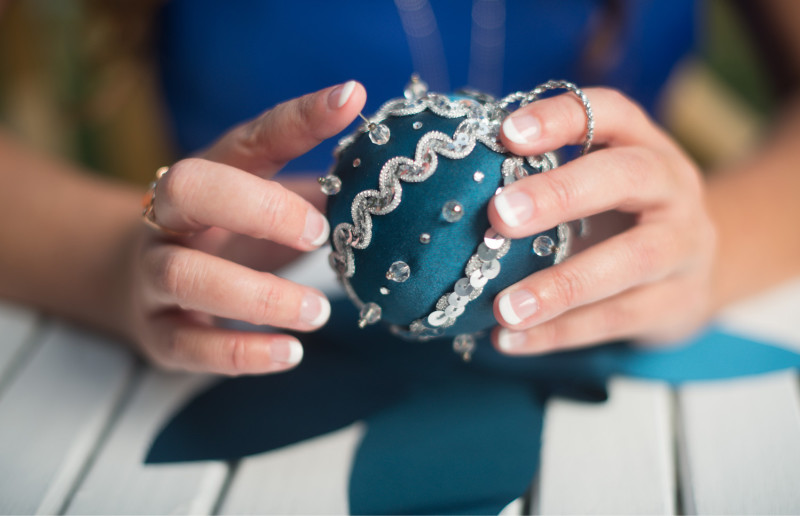
I recently posted this ornament on Facebook, and got tons of great feedback:
And guess what? It's simply a variation of the Moonlight pattern.
The differences are:
- I used 2 different fabrics in place of the blue satin, and alternated them.
- I used braided cord, instead of sequined trim.
- I pinned on some silk leaves, to “fall” from the top.
Other than that, it's the same exact pattern. Same size, same measurements, same everything. :)
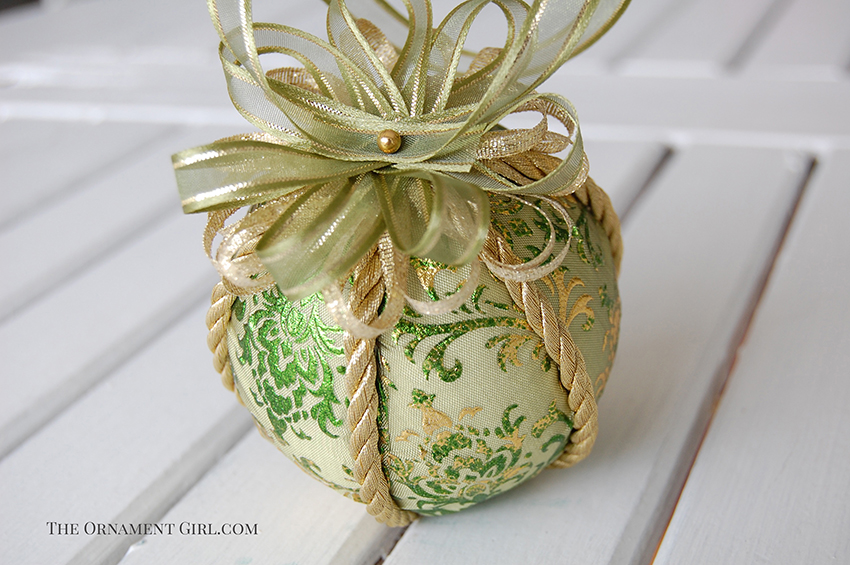
In this post, I'm going to show you another variation, using wide holiday ribbon in place of fabric (that I bought at Hobby Lobby), to make this ornament:
I'm going to outline the variations below to show you how easy it is, but all the measurements and instructions for the original ornament, are shown in (painstaking!) detail in the Moonlight Pattern PDF.
And, if you don't have it yet, you can get it right HERE. (Don't forget… it's FREE!)
Step 1:
Cut out a 3″ smooth styrofoam ball, as per the measurements in the Moonlight pattern…. and 6 pieces of wide ribbon (there's also a fabric/ribbon cutting template included on the very last page of the Moonlight Pattern PDF):
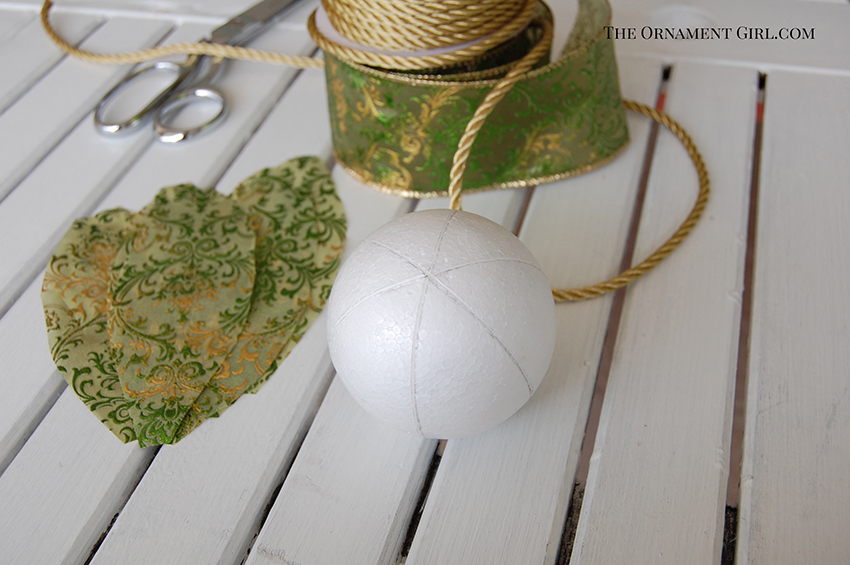
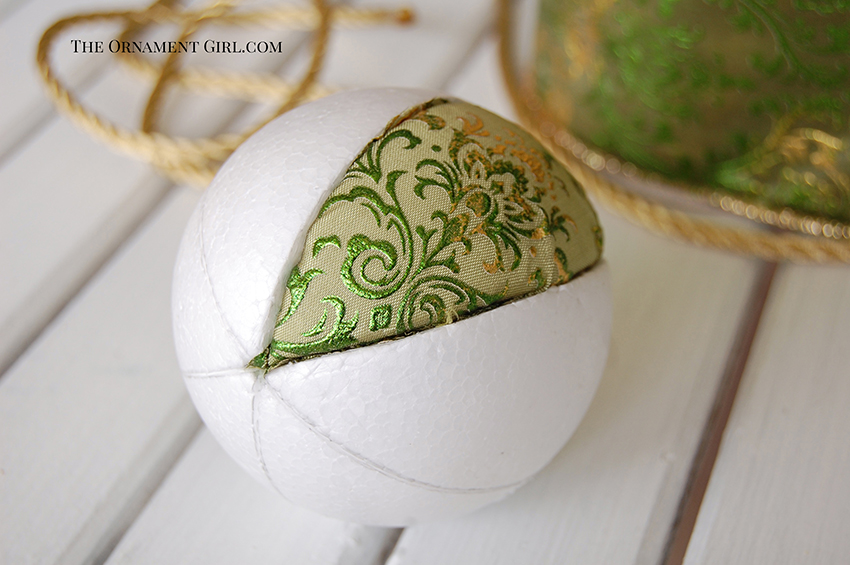
Step 2:
Tuck your first ribbon piece into the grooves of the styrofoam ball:
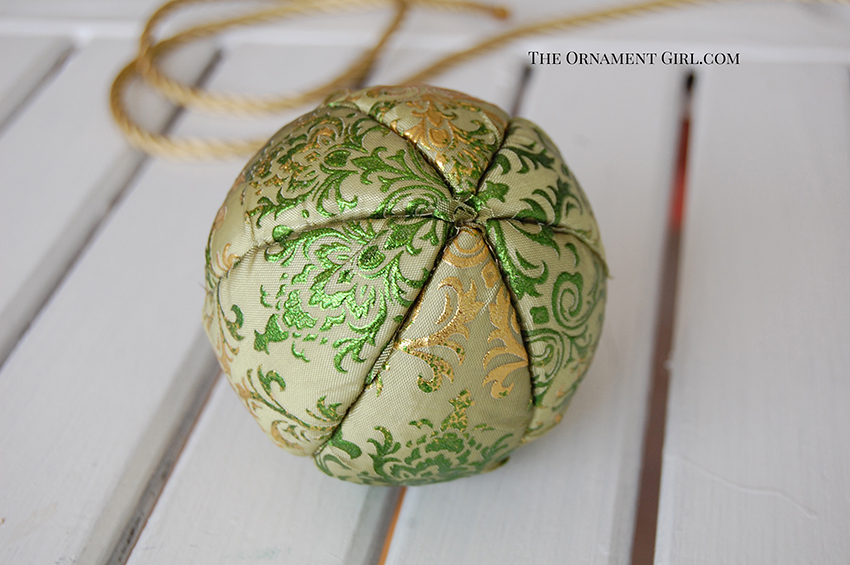
Step 3:
Do the same with the remaining 5 pieces of ribbon.
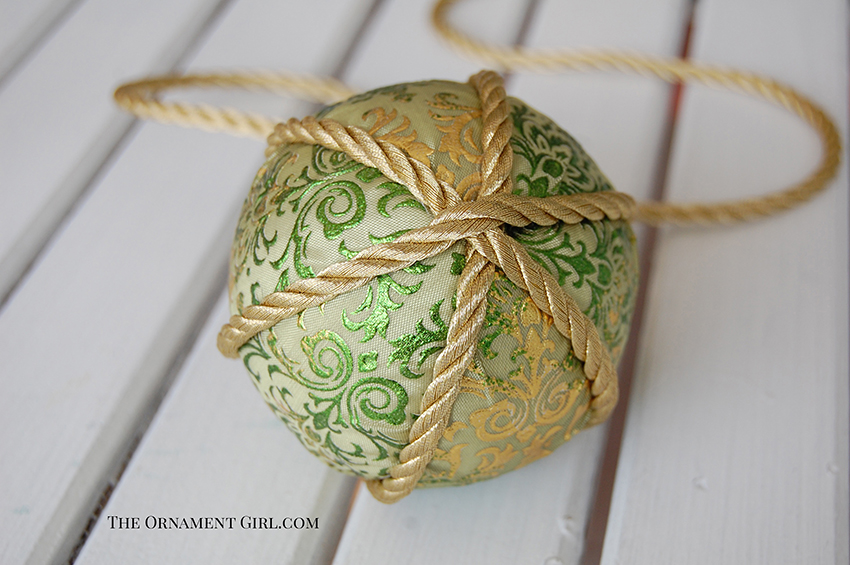
Step 4:
Cover the grooves between pieces, with braided cord (I use Beacon's Advanced Craft Glue for this):
Step 5:
At the top (where your braided trim begins and ends), cover the ends of the cord with a bow & hanger made from narrow ribbon…. and done!
Isn't that WAY easier than it looks? :)
Now just imagine all the different fabrics and trims you could use…. for totally different looks.
And, please tell me your ideas in the comments!
(Here's that Moonlight Pattern again.)
One word ~ AWESOME !!!
Thanks, Libby! :D
Hi. Can’t seem to get the ornament pattern. Please advise next step. Thanx
Hi Judy… I will try to send it by email. Will you let me know if it still doesn’t arrive?
Awesome!
Thank you!
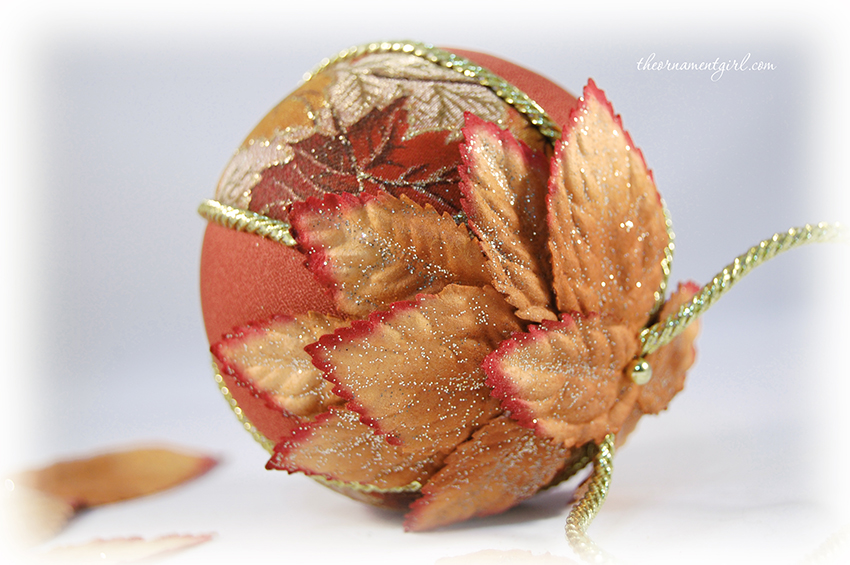
I really love your patterns. The moonlight fall ornament is extra pretty. I love fall colors
Thank you! (I love Fall colors, too, and I miss seeing them living down here in Florida :D)
Staci,
Thank you so much for the different ideas. Really love the one with the leaves.
You do such nice work. I need to get busy and work on the ones I ordered from you.
Good projects to do while watching tv, I find I do better if I multi-task as if I just watch tv, I tend to fall asleep (lol)!!!
Again, thank you for sharing.
Jane
hahah, I do the same thing, Jane! I love to make these while watching t.v. :)
Beautiful!!! Can’t wait to make one! Thank you!
I’m glad you like it! :)
I can’t seem to get the Moonlight pattern–I’ve tried so many times –HELP!!
Oh no… I”m sorry! I am re-sending it to your email right now. Will you let me know if you don’t see it in your inbox?
Got it! Thanks Staci!! Can’t wait to start Christmas gifts!!
Oh good! Thank you for letting me know, and have fun! :)
I love this variation.cannot Waite to try it . Just need to find my exacting knife and buy some cord. Thank you so much for sharing!
thank you i got my pattern and i will be trying my hand at it .
I am unable to download
I’m so glad that you are sooooooooooooooo clever!! I make those deco mesh wreaths to sell at craft fairs. I use A LOT of wide, wired ribbon, and I often have scrap ends left. Now, I can make very unique ornaments!! (I also sew many different items. I’ll use the scrap ends to make more unique ornaments!!
unable to down load pattern guide, pls send to email.
Keep on designing, You do rock our worlds with them.
Staci, I got the moonlight pattern but that is all. Is there more at this point? I’m afraid I am getting behind. Thank You I love them.
I absolutely love these
Thank you so much Kylie!
Please show me how to make these
Hi Kylie, the blog post here will walk you through that: https://theornamentgirl.com/blog/quilted-ornament-tips/no-sew-fabric-ornament-variation/
Where is the pattern for the ornament offered on Pinterest?
Hi Sherry, are you speaking about the moonlight pattern here? https://theornamentgirl.com/blog/get-my-moonlight-ornament-pattern-for-free/ Or the basic star pattern here: https://ornamentgirls.com/basic-star-workshop/ Will you let me know if you need anything further? I’m happy to help! Have a nice day and happy ornamenting. Janelle