
Refurbish an old Christmas ornament with decoupage
Sooo…there are 4 days left until Christmas, and I've got 7 more days of Christmas ornament DIY's to write. I think it's going to work. (and I'm really good at math, so don't worry.) Onward!
I have some old ornaments that I've never been able to bring myself to get rid of, that I usually just keep in the storage box each year. (honestly, there's not really enough room on the tree…) Or, even if they're lucky enough to make it onto the Christmas tree, they get guiltily hung way around the back, so that no sees them except the cat when he gets himself stuck back there.
Here's one of them… plastic, metallic, and beautiful, complete with a slightly broken hanger, and scratched up, chipping off paint. (heyyy…just like my fingernails)

As much as I love classic Christmas ball ornaments like this, this particular guy has seen some better days. I decided it was time for him to get a Mod Podge makeover.
To make an ornament like the one I made, you will need:
- An old ornament
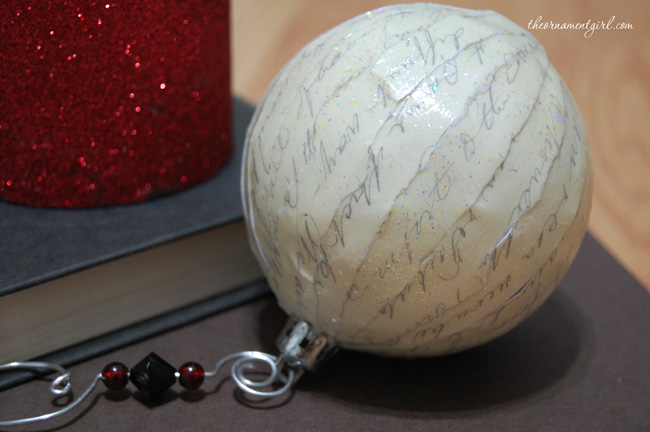
- Paper. I had some leftover scrapbook paper from awhile back when I decoupaged some tin cans for craft supply storage, with some pretty, nonsensical script all over it…I really like it and have been wanting to use it for something, so I went with that. After making my ornament, I don't think that the print was quite as dark as I would have liked, and didn't provide enough contrast. But you could use sheet music, or even pages from an old book…that would look awesome!
- A paint brush
- Mod Podge…I used Matte Mod Podge to glue down my paper, and then coated the whole thing with Sparkle Mod Podge.

Don't tear it like this:

…because you'll end up with uglier edges.
Take the cap off of the ornament if you are able to. Brush some Mod Podge onto the back of a paper strip, and starting at the top of the ornament, glue it down and back up the other side of the ball:

Then, brush a little on top of the paper and smooth it down with your finger so it's nice and flat against the ball:

Keep layering the strips of paper until you have the ball covered:

Pop the top back on the ornament, and then give it a coating of the Sparkle Mod Podge:

It'll take about 30-45 minutes to dry. It's hard to see in the picture, but the ornament has a pretty, all over shimmer to it. I do think it would have been much prettier if the print was a little darker.
I thought about decorating it further with some rhinestones, but I changed my mind and left it simple. Instead, I made a really cool beaded wire hanger to dress it up a little more subtly. That'll be my next DIY. :)
This works just as well with glass balls? Thx.
I am sure it would work just fine! :)
I’m going to try this with some old baubbles that some friends gave to us…that I don’t particularly love. I think I’ll be covering them with old comic book pages, since me and my husabdn are both nerds at heart. :)
That is an awesome idea!
Could regular liquid school glue work on plastic???
[…] refurbish an old Christmas ornament with decoupage […]