

NO-SEW quilted Easter egg pattern eBook!
Your instructions were so good, very detailed and I had no problem following them. Excellent tutorial!” -Karen
You guys LOVED the new quilted Easter eggs I posted about (thank you!)… I finally got the eBook finished for you. :)
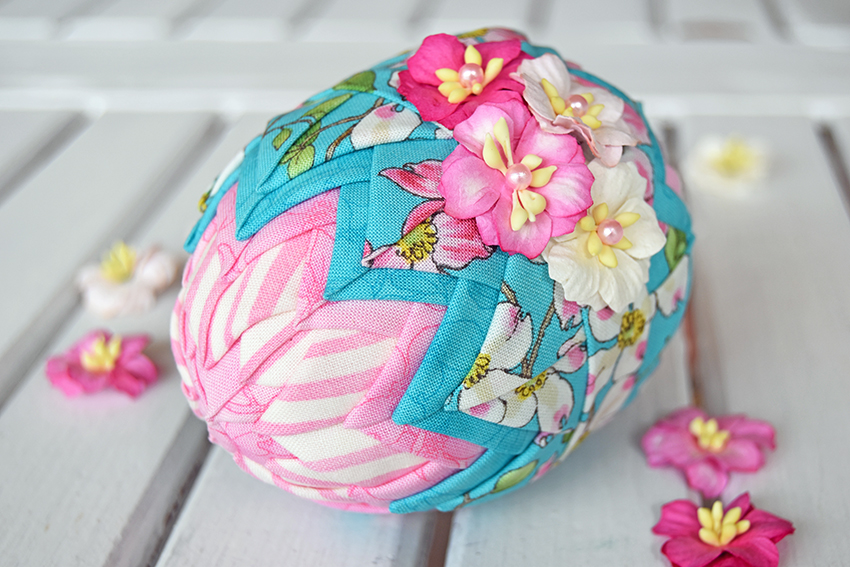
Not only are these so much fun to make… the possibilities are endless for decorating them.
Different color combos, ribbons, embellishments… I mean, they’re Easter eggs, right? So you can use lots of bright colors, patterns… get flashy!
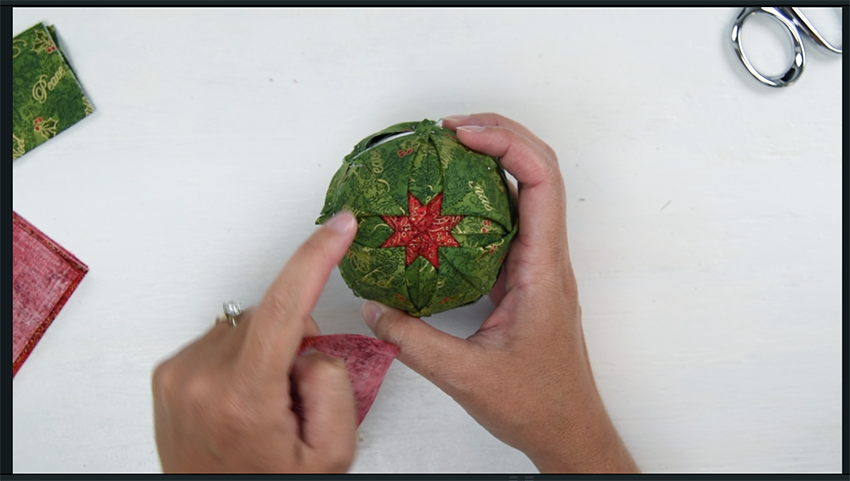
This e-Book has over 70 step-by-step photos showing you how to make these beautiful Easter eggs.
First, I will take you through the process of creating a basic egg. After I show you the technique, I show you more ways to change the look, by making variations in the pattern and finishing your eggs.
The possibilities with these are endless, and by the time you are done with one, you will have come up with tons more of your own creative ideas. (In fact, I would love for you to tell me what you come up with down below in the comments of this post.)
Click Here to Get the eBook Now.
“I love these and was surprised at all the little extras you include with the directions. Thank you!!” -Gloria

My designs have been featured in The Quilter Magazine, Southern Lady Magazine, Nikon, and more.
Why buy a tutorial e-Book from me?
My tutorial makes these Easter eggs a piece of cake, with tons of professional photos, and every single step clearly explained. There is nothing left for you to figure out on your own. Basically, I wrote it like I would have wanted to learn.
Even more importantly, you will learn how to make them perfectly, with an emphasis on straight lines and impeccable design (please take a quick peek through my gallery to see some examples). My instructions are chock full of my personal tips and hints for making your ornaments as absolutely beautiful as possible. I will show you how to use less materials (fabric & pins) than traditional methods (saving you money), and I will show you how to easily get all of your folds lined up perfectly (saving you frustration!). You can see some of the great reviews my tutorials have received HERE.
You will feel like I am sitting right along side of you, explaining every step. :)
And, I explain things in a way that isn’t rigid… you’ll be able to take the techniques from these tutorials, and then very easily expand on them with your own creative ideas.
Click Here to Get the eBook Now.
As always, if you follow this, or any of my other tutorials, and come up with any questions along the way, please don’t hesitate to ask! You can either leave a comment here on my blog, or email me, and I’ll get back to you with an answer as soon as I can. :)
Happy Easter egg making!

Here’s what happens when you purchase a pattern from me:
My tutorials are in PDF format, which means they will be emailed to you as soon as you purchase. No waiting!
As soon as you complete your payment, you will receive an email from me, which will contain the links to your patterns.
If for some reason, you do not receive your email, just let me know, and I will make sure you get it.
Click Here to Get the eBook Now.
Staci I just love your work. Do you sell hard copies as I’m computer illiterate?
[…] No Sew Quilted Easter Egg Pattern | The Ornament Girl […]
How many pieces of each fabric do you need to make the second egg pattern?
[…] SHOP THE PATTERN […]
Can you tell me the dimensions of the fabric squares if using a smaller foam egg?
How do I sign up
Hi Karen, you can sign up for a free video on this pattern right here: https://ornamentgirls.com/get/offset-easter-egg-planner/
I purchased the egg pattern and read through the directions and just wanted to know on the last two egg instructions can a foam egg with lines be used and if so which lined egg. Thank you so much.
Hi Denise, the foam eggs with 8 lines work best for this pattern. I hope that helps!